 My Account
How to Install Finxpert – Finance & Consulting Business WordPress Theme and Import the Demo
If you want your site to look exactly like the Finxpert demo, this guide will walk you through every step: installing the theme, importing demo content and widgets, importing Slider Revolution sliders, and setting the homepage and menu.
1. Preparation
Before you start, make sure you have:
- A working WordPress site
- The Finxpert theme package (usually a ZIP file)
- Inside the extracted theme folder you should see a path like:
finxpert-wp/demo-data/
This folder contains:
theme.xml– demo content (pages, posts, menus)widgets.wie– widgets (sidebars, footer)theme-options.json– theme options (optional)rev_slider_1.zip…rev_slider_9.zip– Slider Revolution sliders
2. Install and Activate the Finxpert Theme
2.1 Upload the theme
- Log in to your WordPress dashboard.
- Go to Appearance → Themes → Add New → Upload Theme.
- Choose the Finxpert theme ZIP file (for example
finxpert-wp.zip). - Click Install Now, then click Activate after installation is finished.
Your site is now using the Finxpert theme. Next, we’ll import the demo.
3. Install the “One Click Demo Import” Plugin
3.1 Search and install the plugin
- Go to Plugins → Add New.
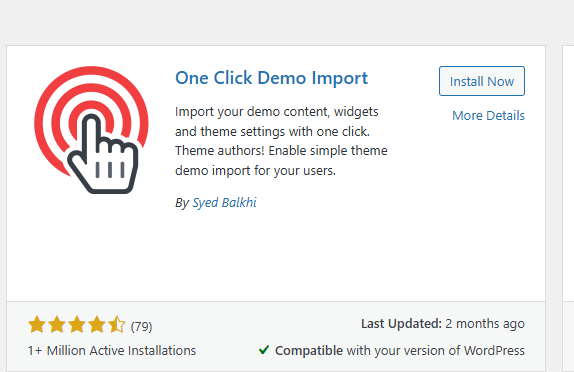
- In the search box, type “One Click Demo Import”.
- Find the plugin named One Click Demo Import and click Install Now, then Activate.
3.2 Open the demo import page
After activation, a new menu item appears:
- Go to Appearance → Import Demo Data.
4. Manual Demo Import (Content + Widgets)
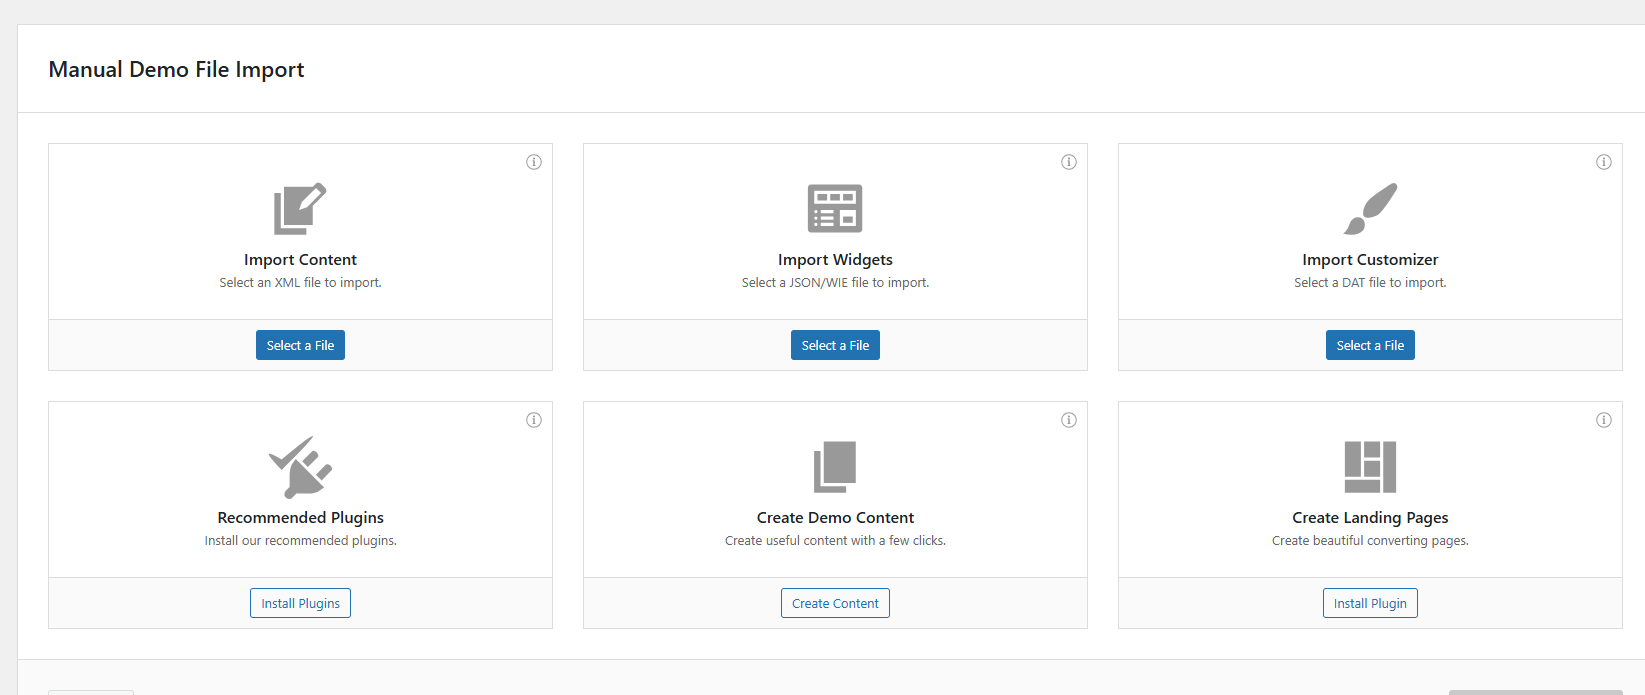
On the Manual Demo File Import screen you will see three main boxes:
- Import Content (XML)
- Import Widgets (JSON/WIE)
- Import Customizer (DAT)
We’ll connect each box with the correct file from the Finxpert package.
4.1 Import Content (XML)
This step imports all pages, posts and menus.
- Under Import Content, click Select a File.
- From your theme folder, choose:
finxpert-wp/demo-data/theme.xml
- Confirm the file.
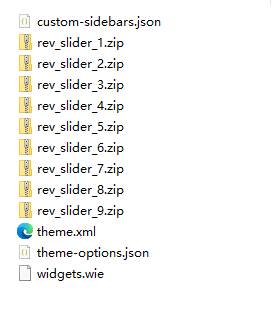
4.2 Import Widgets (JSON/WIE)
This step imports the sidebar and footer widgets used by the demo.
- Under Import Widgets, click Select a File.
- Choose:
finxpert-wp/demo-data/widgets.wie
- Confirm the file.
4.3 Import Customizer (DAT) – optional
The Import Customizer box expects a .dat file.
If the Finxpert package does not include a Customizer .dat file, you can leave this field empty. The theme will still work fine.
4.4 Run the import
Before running the import, double-check:
- Import Content =
theme.xml - Import Widgets =
widgets.wie
Then:
- Scroll down and click Import Demo Data.
- Wait until the process finishes. Do not close the browser tab during the import.
- When it’s done, you’ll see a success message.
Now all demo pages, posts, widgets and menus are in your site.
5. Import Slider Revolution Sliders
Finxpert uses Slider Revolution for the homepage hero sliders. These are stored as several .zip files in the demo-data folder.
5.1 Make sure Slider Revolution is active
- Go to Plugins → Installed Plugins.
- Confirm that Slider Revolution is installed and Activated.
- If not, install and activate it first (usually it comes bundled with the theme).
5.2 Open the manual import screen
- In the left WordPress menu, click Slider Revolution.
- On the main dashboard, find and click Manual Import.
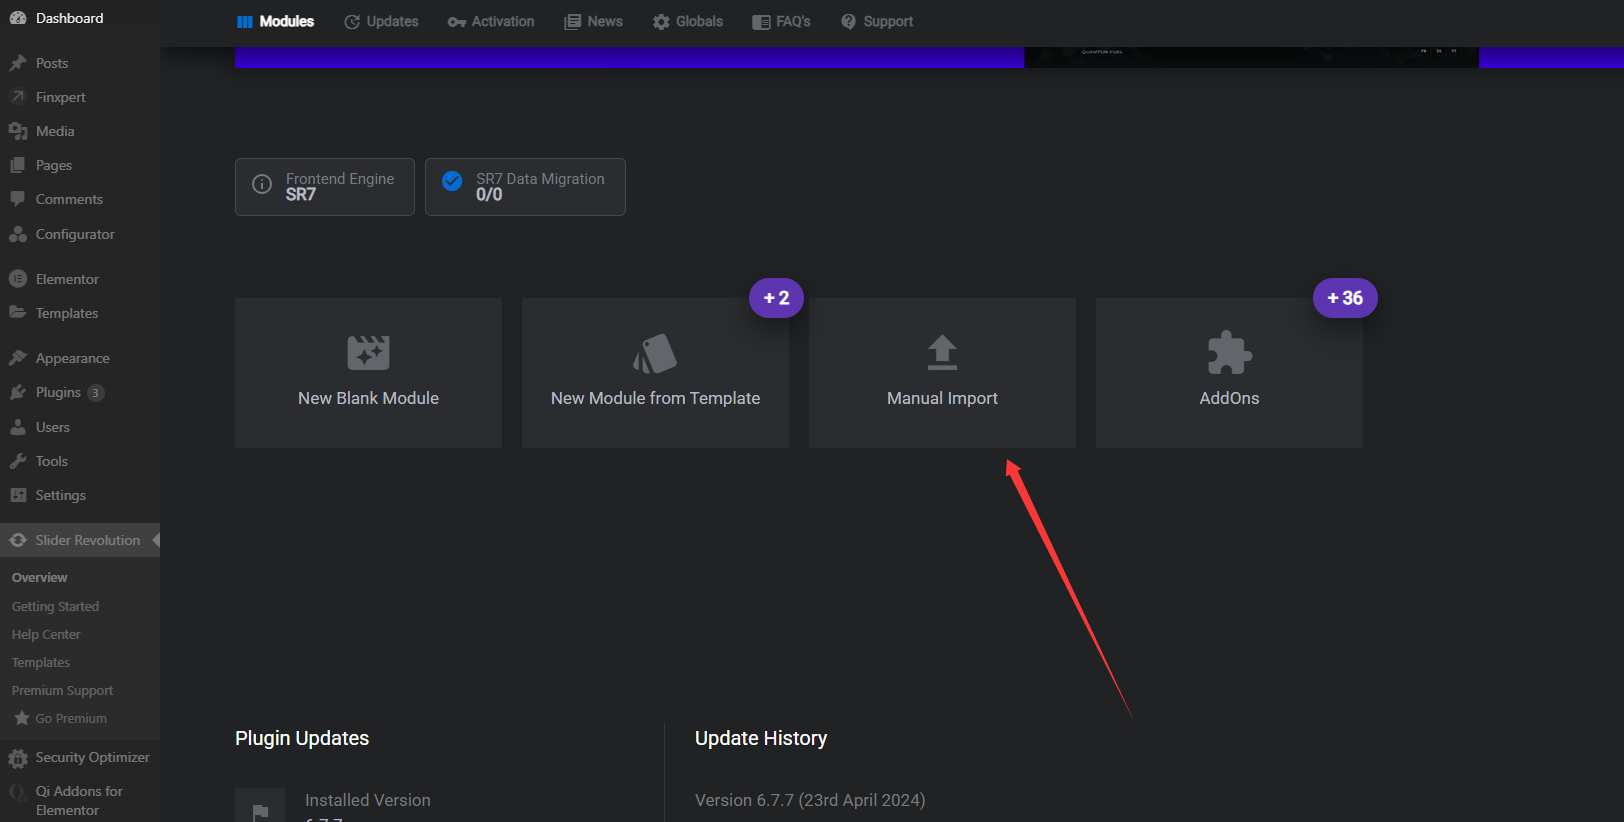
5.3 Import each slider file
Inside finxpert-wp/demo-data/ you’ll see:
rev_slider_1.zip
rev_slider_2.zip
…
rev_slider_9.zip
To import them:
- Click Manual Import.
- Upload
rev_slider_1.zipand wait until it finishes. - Repeat for any other sliders you want to use (
rev_slider_2.zip…rev_slider_9.zip).
Each ZIP file is a complete slider. Later, you can assign the correct slider to the homepage inside Elementor or the page settings.
6. Set the Homepage
After importing, the site has several ready-made home pages (for example Home, Home 1, Main Home). You must choose which one will be the main homepage.
6.1 Choose a static front page
- Go to Settings → Reading.
- Under Your homepage displays, select A static page.
- In the Homepage dropdown, choose a page like:
Home,Home 1,Main Homeor similar (depending on what the demo imported).
- Click Save Changes.
Now visiting your domain should show the Finxpert homepage layout.
7. Assign the Main Menu (8.2 Assign the main menu)
The demo import also created navigation menus. You just need to assign them to the correct theme location.
- Go to Appearance → Menus.
- At the top, choose the imported menu from the dropdown (for example Main Menu or Primary Menu), then click Select.
- In the Menu Settings or Display location area, tick the checkbox for:
Primary,Main, orHeader(the exact wording depends on the theme).
- Click Save Menu.
Refresh your site’s front-end: the main navigation should now appear in the header.
8. Final Checks and Tips
- If some images or pages are missing, you can re-run the demo import once (but avoid importing multiple times if everything already looks correct).
- Use Elementor to edit homepage sections, text and images to match your brand.
- You can edit the imported Slider Revolution modules to update headlines, animations and background images.
With these steps, your Finxpert – Finance & Consulting Business WordPress Theme site should now look very close to the official demo, ready for you to customize and launch.